
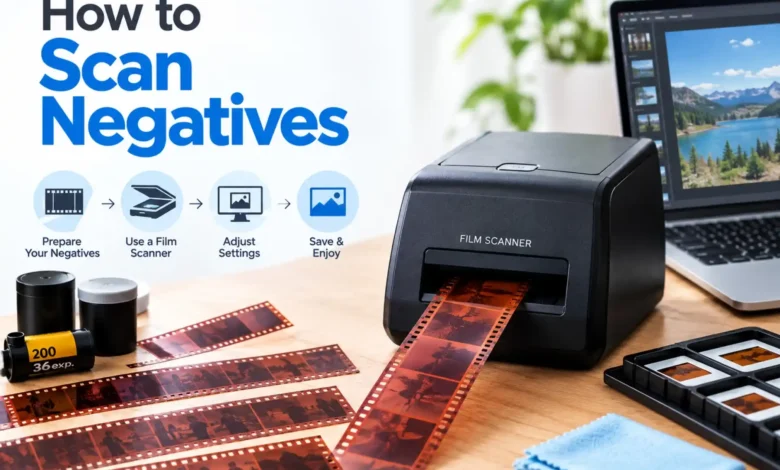
To scan film negatives at home, you need to shine light through the film while capturing it with a flatbed scanner, a digital camera, or a smartphone setup, and then invert the inverted colors using editing software. Standard document scanners will not work because they reflect light off the front of the paper rather than passing light through the clear film base.
Film photography has a unique look that digital filters cannot quite replicate. But leaving those old memories in boxes in the attic risks letting them degrade from humidity or temperature swings. Digitizing them preserves the frames forever. Let us look at how you can get crisp, clear digital files from your old physical negatives without spending a fortune at a lab.
What Equipment Do You Need to Scan Negatives?
You do not need a commercial lab machine to get crisp digital files. Most people choose one of three primary hardware paths depending on budget, existing gear, and patience.
The Flatbed Scanner: The Traditional Workhorse
A dedicated photo flatbed scanner features a built-in light in the lid. This light source is essential for illuminating film evenly from behind. Models like the Epson Perfection V600 have been industry staples for over a decade because they include specialized plastic trays to hold 35mm and medium format strips perfectly flat.
The DSLR or Mirrorless Camera: The Speed Demon
If you already own a digital camera and a macro lens, this method offers the highest quality and fastest speed. You suspend your camera over a specialized light panel, place the film in a holder, and photograph the negative. While the physical setup takes some time to align, clicking the shutter takes a fraction of a second per frame.
The Smartphone: The Quick and Budget-Friendly Option
For casual archiving, your phone can do a surprisingly good job. You will need a steady mount and a small, high-quality backlight unit like the Lomography DigitaLIZA holder or a small LED tracing pad. This option is cheap, but it relies heavily on the quality of your phone’s macro focus.
How to Prepare Your Film Before Scanning
Dust is the ultimate enemy of film digitization. A single speck of pocket lint on a 35mm negative looks like a massive boulder on a computer monitor.
First, choose a clean, draft-free room. Bathrooms after a hot shower work beautifully because the steam settles airborne dust particles. Wear cotton or antistatic nylon gloves when handling your film strips. If you touch the emulsion with bare fingers, skin oils will leave permanent smudges that attract dirt.
Use a hand-powered rubber air blower to clear off loose debris. For stubborn dust, gently pass an antistatic microfiber cloth over the strip. Never use household glass cleaners or rubbing alcohol on film, as these liquids can permanently dissolve the delicate emulsion layer.
Step-by-Step: How to Scan Negatives with a Flatbed Scanner
Using a dedicated flatbed scanner gives you highly consistent results, though it takes a couple of minutes per frame.
-
- Clean the scanner glass: Wipe down the flatbed surface with a lint-free cloth. Dust on the glass will show up just as clearly as dust on the film.
- Load the film holder: Pop your negatives into the plastic trays. Make sure the shiny side faces up and the dull, matte side faces down toward the glass.
- Configure the software: Open your scanning program, such as VueScan or Epson Scan. Switch the mode from “Document” to “Film” or “Transparency.” Set the color depth to 48-bit color or 16-bit grayscale for black-and-white images.
- Choose your resolution: Select an optical resolution between 2400 DPI and 3200 DPI. Scanning at 9600 DPI might sound enticing, but it creates bloated file sizes without adding real detail.
- Turn off auto-corrections: Disable the software’s built-in color adjustments, auto-exposure, and heavy sharpening filters. You want a flat, neutral image that contains all the raw data for manual editing later.
- Hit scan: Save your files as uncompressed TIFF files rather than JPEGs to preserve detail.
Step-by-Step: How to Scan Negatives Using a Digital Camera
Camera scanning requires a bit of geometry to keep the image sharp from corner to corner.
   [ Digital Camera ]  <- Levelled perfectly flat
          ||
          ||  <- Copy stand or sturdy tripod
          ||
   [ Film Negative ]   <- Mounted in a rigid holder
   [ Light Panel   ]   <- Uniform LED light source (95+ CRI)
First, place your LED light panel flat on a table. Turn it on and position your film holder directly over the illumination surface. A good light source must have a high Color Rendering Index (CRI) rating of 95 or above. Cheaper LED tracing pads often introduce a heavy blue or green tint that makes color correction a nightmare.
Next, mount your camera onto a copy stand or a tripod with a reversible center column so the lens points straight down. Use a small bubble level placed on the camera screen and another on the film holder. If these two surfaces are not perfectly parallel, the edges of your final photo will drift out of focus.
Set your camera to its native ISO, usually ISO 100, to prevent digital noise. Adjust your aperture to f/8; this is generally the sharpest point on a macro lens and provides just enough depth of field to cover slight curves in the film. Manually focus on the grain of the film using your screen’s magnification tool, then trigger the shutter using a two-second timer or a remote release to eliminate vibration. Always shoot in your camera’s RAW format.
How to Invert Your Negatives into Beautiful Color Photos
Once you have your digital files, they will still look like orange-tinted negatives on your screen. You need to flip the colors to make them look normal.
Orange Negative Image  ==>  Invert Tone Curve  ==>  Final Positive Photo
(Bright highlights)        (Flip Blacks & Whites)   (Natural colors & tones)
If you are comfortable using Adobe Lightroom or Photoshop, you can manually invert the image by adjusting the Tone Curve. Click the bottom-left point of the curve (the blacks) and drag it to the very top left. Then, take the top-right point (the whites) and drag it to the bottom right. The image will instantly reverse into a positive picture.
From there, use the eyedropper white-balance tool to click on the unexposed clear plastic border between the film frames. This removes the heavy orange mask inherent to color negative stocks like Kodak Gold or Fujifilm Superia.
For large archives, doing this manually for every frame gets tedious. Tools like Negative Lab Pro (a plugin for Lightroom) automate this process. It reads the specific color profile of your film and balances the tones perfectly with a single click.
Common Film Scanning Mistakes to Avoid
-
- Newton Rings: These look like rainbow-colored oil slicks across your digital image. They happen when the smooth, glossy side of your film presses directly against the scanner glass, creating optical interference patterns. Using a proper film holder that keeps the negative suspended a fraction of a millimeter above the glass eliminates this completely.
- Over-sharpening during the scan: Many scanner software suites turn on digital sharpening by default. This makes film grain look harsh, blocky, and digital. Keep sharpening turned off during the capture phase; you can always add subtle, controlled sharpness later inside Photoshop or Lightroom.
- Squeezing film with standard glass: If your film is heavily curled, you might feel tempted to press it down under a heavy sheet of window glass. Standard glass often leaves reflections or scratches. If you must flatten a stubborn negative, purchase specialized anti-Newton ring (ANR) glass panels designed for archival photography.
6. FAQ Section
Can I use a regular document scanner to scan negatives?
No, a standard document scanner cannot scan negatives because it bounces light off the front of an object. To capture a film negative, light must shine through the back of the film base toward the sensor. Without a dedicated transparency light built into the lid, your scans will look like blank, dark rectangles.
What resolution should I use when scanning 35mm negatives?
You should scan 35mm film negatives at a resolution between 2400 DPI and 3200 DPI. Scanning at this level yields a digital file of roughly 10 to 14 megapixels, which captures the real detail of the film grain and allows for crisp 8×10-inch prints.
Why are film negatives orange?
Film negatives have an orange tint because of a chemical mask called couplers built into the film layers. This tint corrects for color impurities in the cyan and magenta dyes when the film is printed onto photographic paper. Editing software easily removes this tint during digitization.
Is it faster to use a scanner or a DSLR camera for film digitization?
A DSLR camera setup is significantly faster than a flatbed scanner once it is fully aligned. A flatbed scanner takes roughly one to two minutes per frame, while a digital camera captures a frame instantly with a single click of the shutter button.
7. Conclusion
The single most important factor when you scan negatives is keeping the film perfectly flat and completely free of dust. Whether you choose the slow precision of a flatbed scanner or the rapid speed of a digital camera rig, taking the time to blow away loose lint before capturing the frame will save you hours of digital cleanup work later.
